How Do i connect with Mywifiext Net login setup page via www.mywifiext.net or Mywifiext.local?
To Set Up Mywifiext.net Wifi Range Extender With Smart Wizard Genie Setup
-Go to All Programs by tapping Start. Select the Netgear Smart Wizard option after searching for the Netgear wireless adapter folder.
-On the desktop, the Netgear Smart Wizard wireless utility will appear.
-Select the Networks tab from the drop-down menu. It will automatically scan the area for any available wifi networks.
-Then click the Connect button after selecting the SSID of the wireless network to which you want to connect.
-Under the Security option in the Settings tab, select WPA.
-In the empty space next to the WPA drop-down option, type the WPA passphrase or password.
-Create a name for the profile in the Profiles field that will help you recall the wireless network settings in the future, and then click Save Profile.
-To validate the settings, select the option Apply.
-Go to the About page and look for the IP address if you’re connected wirelessly. Contact our IT specialists for further information on how to install a Netgear router.
Installing The Ex2700 Using WPS | W P S Guide
- Place the extender in the same room as the Wi-Fi router.
- Check to see if the internet connection is shared between the two routers. Also, make sure your router supports WPS.
- Wait until the LED power becomes stable after connecting the extender to an electrical (power) outlet.
- If it doesn’t turn on, hit the On/Off button on the extension panel’s side.
- The WPS led will begin blinking after three seconds of pressing the WPS button on the extender’s side panel.
- Press the WPS button on your main router after two or three minutes.
- To signify that your new extender setup is linked to the primary network, the Router Link Led and WPS LED on the extender should turn green.
- You can place the extender wherever you choose, but it must be between your router and wireless device to receive a good signal.
- You can now connect your wireless device to the new SSID of the Extender.
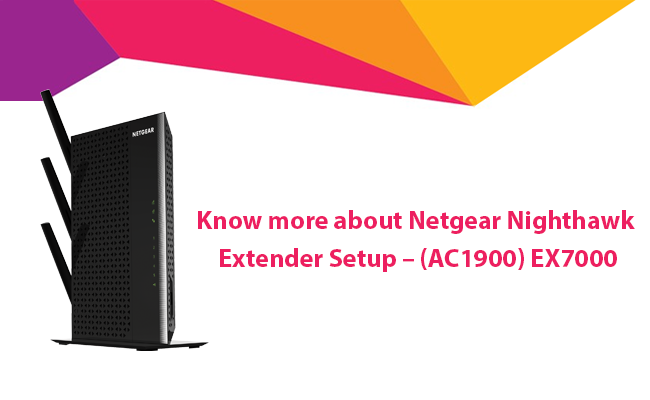
To set up your EX7000 as a wireless range extender, follow these instructions.
-Connect your system to the EX7000 through a wired or wireless connection, then proceed to the next step in the Netgear EX7000 Setup installation.
-To make a wired connection, connect your computer to one of the EX7000’s Ethernet ports using an Ethernet cable.
-To connect to the NETGEAR-EXT Wi-Fi network, open the Wi-Fi network manager on your wireless computer or any other Wi-Fi device and select the NETGEAR-EXT Wi-Fi network.
-The device’s Extender LED will become green once it is attached.
-Any web browser, such as Internet Explorer, Mozilla Firefox, or Google Chrome, should be used.
-In the address bar, put www.mywifiext.net.
-Select NEW EXTENDER SETUP from the drop-down menu.
-Fill in the essential details on the screen to complete the extension setup, then click Next.
-Your EX7000 GUI user name and password are stored in this account.
-When the Mywifiext.net displays, pick Wi-Fi Range Extender as an option.
-Select the Wi-Fi network you want to extend and then click Next. Note: If your router doesn’t -support the 5GHz band, uncheck it before moving on to the next step.
-Click Next after entering your Network passphrase or key. You can now modify your Wi-Fi range extender’s SSID and password, or stick with the current network and password.
-To save the settings, select the Next option.
-Before choosing Continue, connect the wireless device to the EX7000 SSID once the settings have been saved.
-The Extender has successfully joined the current Wi-Fi network. To continue, select the Next option.
-Fill out the product registration form to gain access to product support, new product information, software updates, and notifications. After you’ve finished filling out the form, click the Finish button. Note: If your device has previously been registered, you can skip the registration process by selecting the Skip registration option at the top of the page. Connect with the technical specialists for further information on how to install a Netgear extender setup via mywifiext net or mywifiext local setup page.
Setup a connection with a web browser via Mywifiext.net
- Connect the extension cord to a power source.
The Power LED glows in the colour green. Press the Power button if the Power LED does not light.
- From the same computer or mobile device, open a web browser window.
The browser will take you to the NETGEAR genie Smart Setup page.
Launch a web browser and type www.mywifiext.net in the address field if you are not instantly directed to NETGEAR genie. For the user name, type admin, and for the password, type password.
- Click the Continue option after selecting a WiFi network to extend.
- In the Password area, type the network password (also known as a passphrase or security key) and click the Continue button.
- Type the name (SSID) of your new extender WiFi network in the Name field and click the Continue button.
By checking the box, you can use the same security settings as your current network.
- Connect to the extender’s freshly formed WiFi network using a WiFi network manager on your PC or mobile device.
This procedure should be repeated on all of your computers and mobile devices.
- Select the check box at the bottom of the screen and click the Continue button if the screen is still visible on your computer or device.
- Unplug the extension and relocate it closer to the region where the WiFi signal is weak.
You must choose a place that is within range of your existing WiFi router network.
- Connect the extender to a power source.
Green is the colour of the Power LED. Press the Power button if the Power LED does not light up.
Use the Router Link LED to aid in the selection of a location for the extender-to-router connection.
Wi-Fi Protected Setup (WPS) allows you to join a secure WiFi network without having to type the network name or password.
Note that WEP network security is not supported by WPS. Follow the steps on page 7 for Connect with Web Browser Setup if you’re using WEP security. On the extender’s side panel, press the WPS button.
The WPS LED turns on and off.
Note: If you still face any trouble regarding your Netgear Wifi Range Extender/router via Mywifiext.net or Mywifiext.local you can still login via the default login IP address i.e 192.168.1.250.